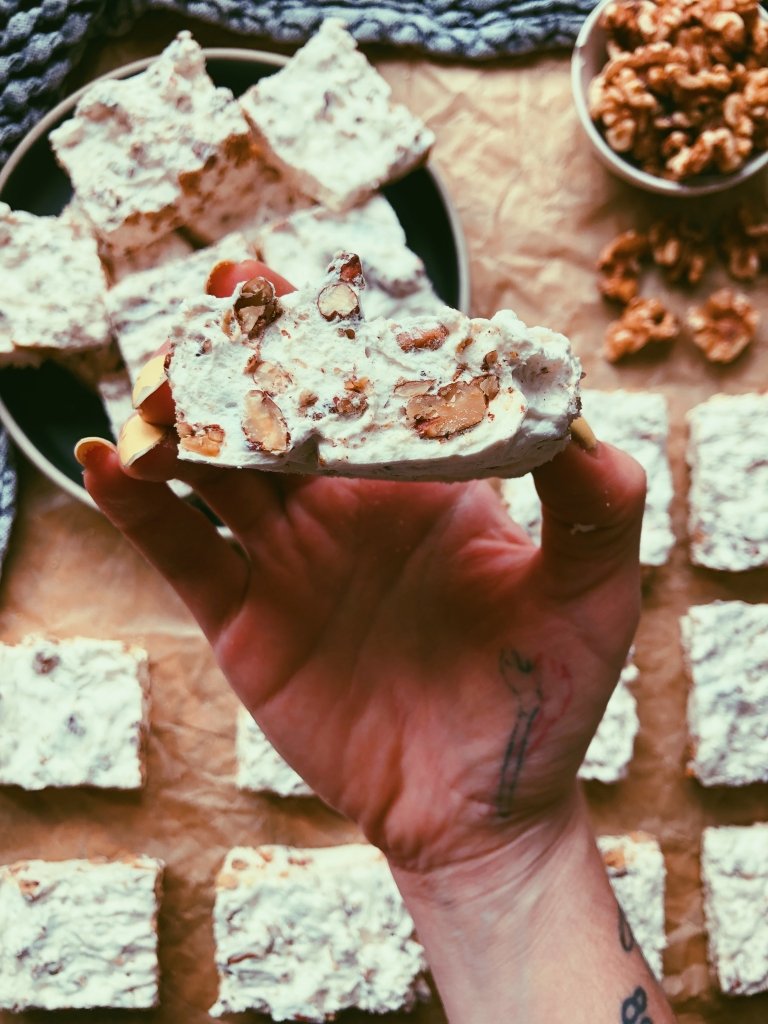
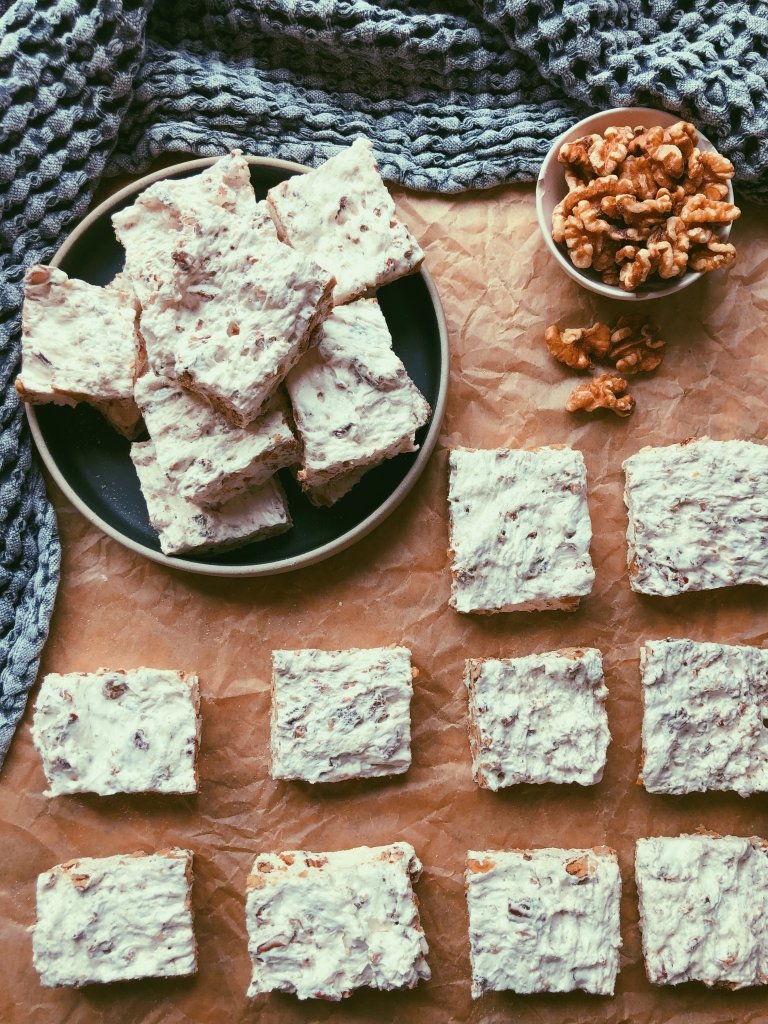
a fluffy marshmallow square filled with toasted pieces of pecans and walnuts.
Ahhh this recipe has been a long time coming! I’ve actually been dabbling and testing various versions of this recipe since, literally, last year?! But it’s only now truly come together in a presentable, and shareable form. And I freaking love them and plan to make other variations of marshmallow squares because gah damn do I love and miss marshmallows as someone on the SCD diet. Not to mention this is a freaking yummy treat!! Something kid-friendly too, I think.
So what are these? I’ve been a frequent maker of Danielle Walker’s homemade marshmallow recipe, it’s simple and superb, but after being inspired by seeing a Sweet Laurel recipe that was a gluten free take on rice krisipie squares, I really wanted to try my own. I forget what the Sweet Laurel recipe had in it, but I thought to myself, let’s make another version of a “rice krispie” without the rice krispie, with somehing that us grain free folk can eat — so the first idea that came to mind, was, of course, nuts and seeds.

I tried an early version of these marshmallow squares with a full-on trail mix in the marshmallow creme, and while that certainly wasn’t bad, it was a bit heavy of a mixture– pumpkin seeds, almonds, cashews and raisins all jostling for position in your mouth! So thus I started to pare the recipe down a bit, and eventually landed at today’s final iteration: simply pecans and walnuts for enough crunch alongside the fluffy marshmallow batter, but not an overwhelming array of nuts.
I also decided to throw some collagen in the final version of this recipe, and while it’s not necessary for the recipe to work, it is a nice thought lol.
The ingredients are pretty simple, although the marshmallow-making-part can be intimidating — I know it was to me the first time I ever made homemade marshmallows — but once you do it once (or twice) you realize it’s really not that bad! Kind of like when you first start making your own yogurt for the SCD diet– soon enough it’s like, a mindless process, because it’s actually not that complicated after all. So don’t be intimidated by making the marshmallow creme, your future self will thank you!! As well your family if they get to enjoy these clouds of deliciousness with you!
I recommend using a high quality, creamy, light-coloured honey for best results, as it creates the most marshmallow-looking marshmallows. And who doesn’t want a marshmallow that actually looks like a marshmallow?! That’s half the fun. And once you get the hang of these, feel free to experiment yourself with the add-ins– I could see chocolate chips if you tolerate chocolate, or else sticking just to pecans for a pecan-only marshmallow square, that would probably also be amazing.
Find the full recipe and instructions below. Please review/drop a comment below if you try making these, or holla at me on Instagram @grainfreee.
A few related recipes if you’re looking for some more dessert ideas:
- PUMPKIN SNICKERDOODLE COOKIES (ALMOND FLOUR)
- HOMEMADE APPLE CINNAMON GRANOLA BARS
- PUMPKIN CHEESECAKE SWIRL CUPCAKES (COCONUT FLOUR)
- KEY LIME PIE BARS
- HOMEMADE FIG NEWTON COOKIES (ALMOND FLOUR)

grain free marshmallow pecan-walnut squares: ingredients
- 1 cup creamy honey light coloured
- 1 cup water
- 1 tsp pure vanilla extract
- 3 tbsp gelatin
- 3 tbsp collagen
- 2 cups pecans
- 2 cups walnuts
- 1+1/2 tsp cinnamon
grain free marshmallow pecan-walnut squares: how to
- start by chopping your nuts, tossing them in cinnamon, and toasting them at 310 for 20 minutes.
- remove the nuts from the oven and set aside.
- now, take 1/2 cup of water and place it in a large pot with the 1 cup of honey. bring to a boil for 12-15 minutes, until it reaches a temperature of 240 F (if you have a candy thermometer).
- take the remaining 1/2 cup of water and place it in a stand mixer with 3 tbsp of gelatin on top, as well as the collagen. allow it to sit for 10 minutes, letting the gelatin bloom – ideally you will time these so that you start the water + honey on the stove and let it boil for 5 minutes before then doing the stand-mixer portion, allowing it to sit for 10 minutes in the mixer, while the honey continues to boil for 10 minutes as well.
- once both the gelatin has bloomed for 10 minutes and the honey has reached 240 F or it’s been 15 minutes, you will now drizzle the honey mixture into the stand mixer as you start mixing on low, and slowly drizzle all the honey in.
- turn up the mixer to medium-high, and add in the vanilla as you can continue to mix for 10 minutes or so, until it turns white and becomes fluffy.
- prepare a baking sheet by lining it with parchment paper and sprinkling it in coconut flour, which will assist when it comes time to cut up the squares.
- once the marshmallow is ready, take your toasted and chopped nuts, and remove the paddle from the mixer, adding in the nuts and tossing them in the marshmallow with the help of a spatula or two (it will be sticky!!)
- once it’s all well-mixed, using a spatula, spoon it onto your prepared baking sheet, flattening it to reach the edges of the sheet, making the squares as thin or thick as you like.
- set aside in the fridge, covering in parchment paper, and allow to sit for 24 hours in order to set/firm up.
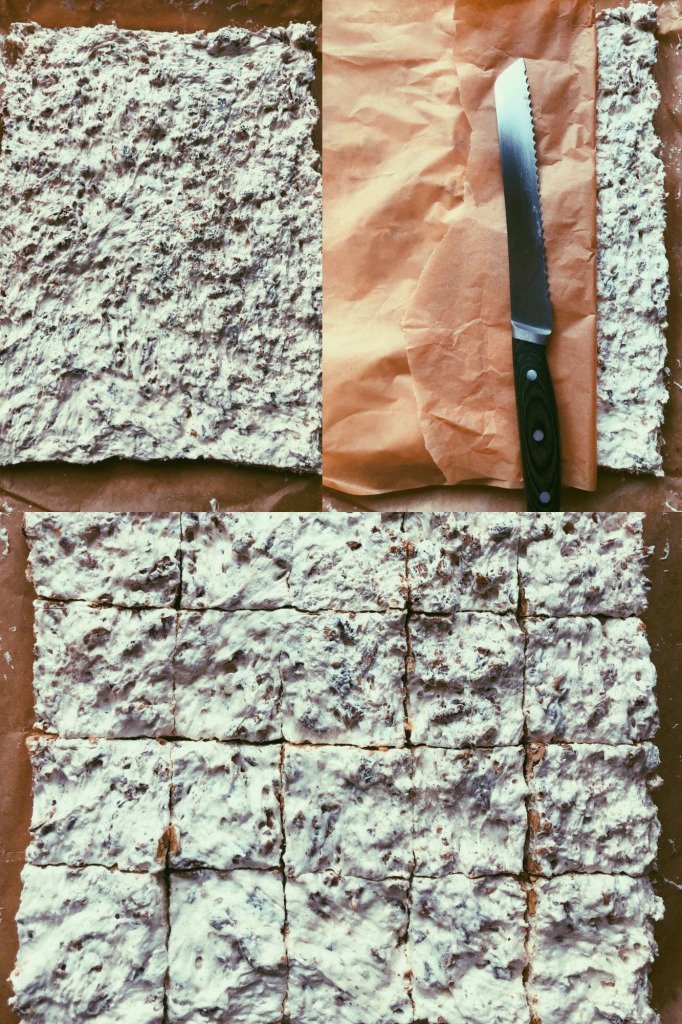
- once the marshmallows are firm, you can slice them up. in order to make the slicing easier and avoid being overtly sticky, i recommend keeping a layer of parchment paper on top of the squares, removing them off the tray (while keeping them on the bottom layer of parchment paper as well) and placing them on top of a large cutting board.
- now fold the top piece of parchment paper vertically along the squares, and slice alongside it, creating the width of the square that you prefer.
- repeat until the squares are all sliced. store in a container, layered between parchment paper or else wrapped individually in parchment paper to avoid sticking. they keep well in the fridge.

marshmallow pecan-walnut squares
Ingredients
- 1 cup creamy honey light coloured
- 1 cup water
- 1 tsp pure vanilla extract
- 3 tbsp gelatin
- 3 tbsp collagen
- 2 cups pecans
- 2 cups walnuts
- 1+1/2 tsp cinnamon
Instructions
- start by chopping your nuts, tossing them in cinnamon, and toasting them at 310 for 20 minutes.
- remove the nuts from the oven and set aside.
- now, take 1/2 cup of water and place it in a large pot with the 1 cup of honey. bring to a boil for 12-15 minutes, until it reaches a temperature of 240 F (if you have a candy thermometer).
- take the remaining 1/2 cup of water and place it in a stand mixer with 3 tbsp of gelatin on top, as well as the collagen. allow it to sit for 10 minutes, letting the gelatin bloom – ideally you will time these so that you start the water + honey on the stove and let it boil for 5 minutes before then doing the stand-mixer portion, allowing it to sit for 10 minutes in the mixer, while the honey continues to boil for 10 minutes as well.
- once both the gelatin has bloomed for 10 minutes and the honey has reached 240 F or it's been 15 minutes, you will now drizzle the honey mixture into the stand mixer as you start mixing on low, and slowly drizzle all the honey in.
- turn up the mixer to medium-high, and add in the vanilla as you can continue to mix for 10 minutes or so, until it turns white and becomes fluffy.
- prepare a baking sheet by lining it with parchment paper and sprinkling it in coconut flour, which will assist when it comes time to cut up the squares.
- once the marshmallow is ready, take your toasted and chopped nuts, and remove the paddle from the mixer, adding in the nuts and tossing them in the marshmallow with the help of a spatula or two (it will be sticky!!)
- once it's all well-mixed, using a spatula, spoon it onto your prepared baking sheet, flattening it to reach the edges of the sheet, making the squares as thin or thick as you like.
- set aside in the fridge, covering in parchment paper, and allow to sit for 24 hours in order to set/firm up.
- once the marshmallows are firm, you can slice them up. in order to make the slicing easier and avoid being overtly sticky, i recommend keeping a layer of parchment paper on top of the squares, removing them off the tray (while keeping them on the bottom layer of parchment paper as well) and placing them on top of a large cutting board.
- now fold the top piece of parchment paper vertically along the squares, and slice alongside it, creating the width of the square that you prefer.
- repeat until the squares are all sliced. store in a container, layered between parchment paper or else wrapped individually in parchment paper to avoid sticking. they keep well in the fridge.

